
Rust and WebSocket: Building a Peer-to-Peer Network
I'm a Senior Software Engineer with a keen interest in IoT, AI, Blockchain, and Data Communication Networks. I work on projects that integrate these technologies to create innovative solutions.
Creating a peer-to-peer (P2P) network over a WebSocket infrastructure can seem like a daunting task, especially if you're new to asynchronous programming in Rust. However, with the right approach, you can build a robust and efficient P2P network that allows real-time communication between nodes. In this post, we'll walk through the key components of our Rust-based P2P network code, exploring how each part contributes to building a seamless WebSocket infrastructure. To view the full source code, check out the project's GitHub repository.
Introduction to P2P Networks
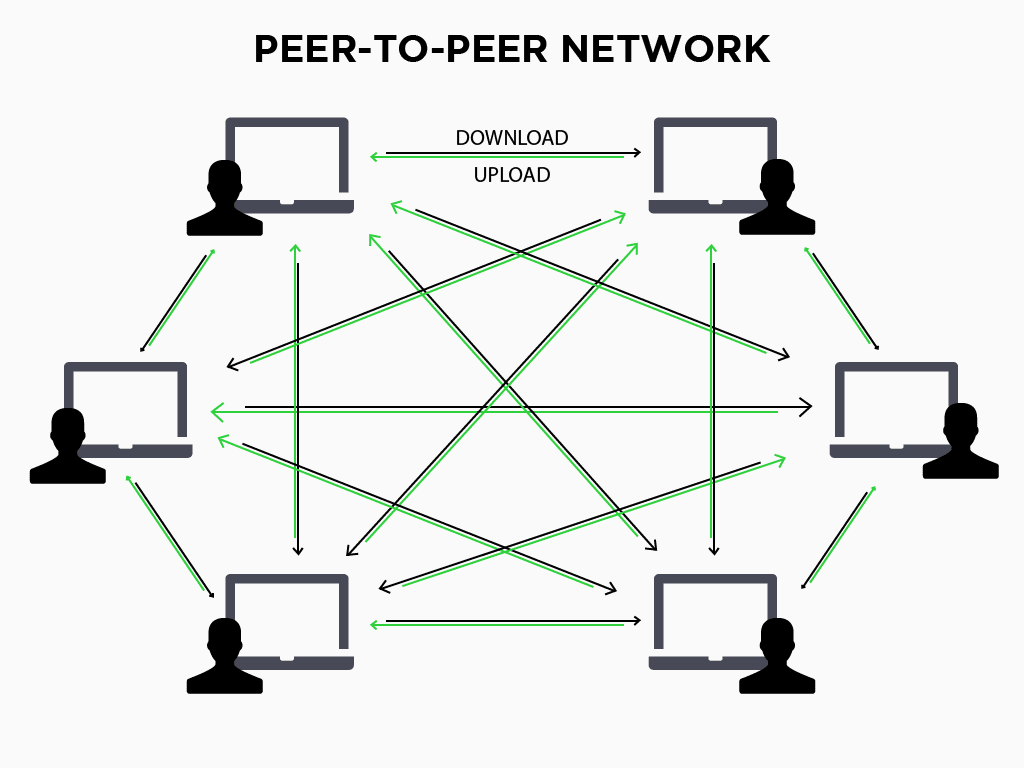
Peer-to-peer networks enable decentralized communication between nodes, allowing data exchange without relying on a central server. Each participant in the network, or "peer," can act as both a client and a server, fostering direct connections and communication. In our example, we use WebSocket, which provide a full-duplex communication channel over a single TCP connection, to facilitate this real-time interaction.
Overview of the Project
Our project is structured to demonstrate how to establish a P2P network using WebSocket in Rust, leveraging the power of asynchronous programming with the Tokio runtime. We'll explore the following key components:
Command-Line Argument Parsing: We'll use
clapto parse the peer URLs and bind address.WebSocket Actor: This component manages WebSocket connections to peers.
Network State Management: We'll maintain the state of the network, including connected peers.
Connection Handling: We'll manage the lifecycle of WebSocket connections with peers.
Broadcasting Messages: We'll send messages to all connected peers periodically.
Graceful Shutdown: We'll handle interruptions gracefully to shut down the network.
Understanding the Code
Command-Line Argument Parsing
We'll start by defining our command-line arguments using clap. This allows us to specify peer URLs and the bind address when starting our P2P node.
#[derive(Parser, Debug)]
#[command(author, version, about, long_about = None)]
struct Args {
    /// List of client addresses to connect to
    #[arg(short, long, value_delimiter = ',', value_parser = parse_peer)]
    peers: Vec<String>,

    /// Address to bind the server
    #[arg(short, long, value_parser = parse_bind)]
    bind: String,
}
--peers: A comma-separated list of WebSocket URLs to connect to as peers.--bind: The address to bind the server for incoming connections.
WebSocket Actor
The WebSocketActor struct manages WebSocket connections. It establishes a connection to a given URL and handles the sending and receiving of messages.
struct WebSocketActor {
    ws_stream: WebSocketStream<MaybeTlsStream<TcpStream>>,
}

impl WebSocketActor {
    async fn connect(url: &str) -> Option<Self> {
        match connect_async(url).await {
            Ok((conn, _)) => {
                log::info!("Connected successfully to {}", url);
                Some(WebSocketActor { ws_stream: conn })
            }
            Err(e) => {
                log::error!("Connection to {} failed: {:?}", url, e);
                None
            }
        }
    }
}
Network State Management
The P2PWebsocketNetwork struct maintains the state of the network, including connected peers and a master sender for message broadcasting.
struct P2PWebsocketNetwork {
    addresses: Arc<Mutex<HashMap<SocketAddr, UnboundedSender<P2PInnerMessage>>>>,
    master: Arc<Mutex<UnboundedSender<P2PInnerMessage>>>,
}
Connection Handling
We'll handle incoming and outgoing connections using the handle_connection and handle_server_connection functions. These functions manage the lifecycle of WebSocket connections, sending and receiving messages.
async fn handle_connection(
    state: Arc<P2PWebsocketNetwork>,
    conn: WebSocketActor,
    token: CancellationToken,
) {
    // Logic for handling connections and message exchange
}
Function Signature
state: A shared state (Arc<P2PWebsocketNetwork>) that contains the network's information, including connected peers and message handlers.conn: AWebSocketActorinstance representing the connection with a peer.token: ACancellationTokenused to handle task cancellation for graceful shutdown.
Extracting the Socket Address
let addr = match conn.ws_stream.get_ref() {
    MaybeTlsStream::Plain(f) => f.peer_addr().unwrap(),
    _ => {
        panic!("tls is not supported yet");
    }
};
addr: The socket address of the peer. The code extracts the peer's address from the WebSocket stream. Currently, only non-TLS (plain) streams are supported.
Setting Up the Message Channel
let (tx, mut rx) = unbounded_channel::<P2PInnerMessage>();
{
    let mut list = state.addresses.lock().unwrap();
    list.insert(addr, tx.clone());
}
txandrx: An unbounded channel for sending and receiving messages (P2PInnerMessage) between this function and other parts of the application.state.addresses: The connected peers' addresses are stored in a sharedHashMap, and the new peer's address and its sender (tx) are added to the list.
Splitting the WebSocket Stream
let (mut ws_tx, mut ws_rx) = conn.ws_stream.split();
ws_txandws_rx: The WebSocket stream is split into a sender (ws_tx) and a receiver (ws_rx) to handle incoming and outgoing messages asynchronously.
Message Handling Loop
loop {
    tokio::select! {
        Some(msg) = ws_rx.next() => {
            log::debug!("Received: {:?}", msg);
            match msg {
                Ok(msg) => {
                    if let Err(e) = state.master.lock().unwrap().send(P2PInnerMessage {
                        message: msg,
                        tx_handler: tx.clone(),
                    }) {
                        log::error!("Failed to send message to master: {:?}", e);
                    }
                },
                Err(e) => {
                    log::error!("Error receiving message or connection closed: {:?}", e);
                    break
                }
            }
        }
        Some(msg) = rx.recv() => {
            log::debug!("Sending: {:?}", msg);
            if let Err(e) = ws_tx.send(msg.message).await {
                log::error!("Failed to send message on socket: {:?}", e);
            }
        }
        _ = token.cancelled() => {
            log::warn!("task is cancelled");
            break
        }
    }
}
Incoming Messages (
ws_rx): The loop usestokio::select!to wait for multiple asynchronous events. It first checks for incoming messages from the peer (ws_rx.next()).If a message is received successfully, it is forwarded to the master handler by sending it through
state.master. This allows centralized processing or routing of messages.If an error occurs (e.g., connection closed), the loop breaks, effectively terminating the connection.
Outgoing Messages (
rx): The loop also checks for messages received from the application's internal channels (rx.recv()), intended to be sent to the peer.- The message is sent to the peer using
ws_tx.send(msg.message).await. Errors in sending are logged.
- The message is sent to the peer using
Cancellation Token: If the cancellation token is triggered (
token.cancelled()), the loop breaks, allowing the task to exit cleanly.
Removing the Peer from the List
{
    let mut list = state.addresses.lock().unwrap();
    list.remove(&addr);
}
Once the loop exits (either due to an error or cancellation), the peer's address is removed from the list of connected addresses, ensuring that the state reflects the current network connections accurately.
The handle_server_connection function operates as described above.
Broadcasting Messages
Our broadcast function sends a message to all connected peers periodically, demonstrating the P2P network's ability to propagate information.
async fn broadcast(
    state: Arc<P2PWebsocketNetwork>,
    tx: UnboundedSender<P2PInnerMessage>,
    bind: String,
) {
    // Broadcast messages to all connected peers
    let list = state.addresses.lock().unwrap();
    for (i, cl) in list.iter().enumerate() {
        log::debug!("Broadcasting to {} ", cl.0);
        if let Err(e) = cl.1.send(P2PInnerMessage {
            message: tungstenite::protocol::Message::text(format!(
                "Message to client {} from {}",
                i, bind
            )),
            tx_handler: tx.clone(),
        }) {
            log::error!("Failed to send broadcast message: {:?}", e);
        }
    }
}
#[tokio::main]
async fn main() {
// other parts of the code
 loop {
        tokio::select! {
            //other match rules
             _ = tokio::time::sleep(tokio::time::Duration::from_secs(10)) => {
                tracker.spawn(broadcast(network_state.clone(), tx.clone(), args.bind.clone()));
            }
        }
    }
}
Graceful Shutdown
Finally, we'll ensure our network can be shut down gracefully by handling Ctrl+C signals and canceling tasks accordingly.
loop {
    tokio::select! {
        Some(msg) = rx.recv() => {
            // Process received messages
        }
        _ = tokio::signal::ctrl_c() => {
            log::warn!("Received Ctrl+C, shutting down...");
            tracker.close();
            cancelation_token.cancel();
            break
        }
    }
}
// wait unitl all tasks are closed
tracker.wait().await;
Running the Project
In separate sessions, run the program in the following order with these arguments:
$ RUST_LOG=debug cargo run -- --bind localhost:8080 # start the first node
$ RUST_LOG=debug cargo run -- --peers ws://localhost:8080 --bind localhost:8085 # start the second node
$ RUST_LOG=debug cargo run -- --peers ws://localhost:8080,ws://localhost:8085 --bind localhost:8086 # start the third node
Then you will see messages being broadcast from each peer to all others. It's an all-to-all broadcast!
Conclusion
Building a P2P network over WebSocket infrastructure in Rust offers a powerful and efficient way to enable real-time communication between nodes. By understanding each part of our code, you can extend and customize this example to fit your specific needs, whether for decentralized applications, real-time data sharing, or distributed computing tasks. To view the full source code, check out the project's GitHub repository.
We hope this walkthrough helps you understand the core concepts and inspires you to explore more possibilities with Rust and P2P networks. Happy coding!